Kubectl cheatsheet

Kubectl is a command line interface for running commands against Kubernetes clusters. This overview covers kubectl syntax, describes the command operations, and provides common examples. TEST

kubectl get pods
 
kubectl describe pod <pod-name>
 
kubectl expose pod <pod> --port = 4444 --name=frontend #expose port of a pod, creates new service
 
kubectl port-forward <pod-name> 8080
 
kubectl attach <pod-name> -i
 
kubectl exec <pod-name> mylabel=awesome
 
kubectl run -i -tty busybox --image=busybox --restart=never --sh
Kubectl cheatsheet

How to design SQL database Schema

Steps:

  1. Write down all the possible tables
  2. Identify which is child and which is parent
    (Note: Child cannot exist without parent, example: user comments in facebook cannot exist without user, so comments is child and user is parent)
  3. Add Foreign Keys to child tables
    (Note: Always Child will have the Foreign Key)
  4. Identify one to one relationships
    (Note: user and passport details is one to one relationship, if both primary keys are mapped (FK) then the relation becomes one to one)

Tips:

  • Tables with surrogate keys should never be Parent.
  • Go through Oracle schemas and think over the design
  • Question yourself after you did the design
    (Note: If parent deletes child also deletes)
How to design SQL database Schema

Beginner Linux Commands

Summary

  • Dealing with Directories
  • Dealing with Files
  • Getting started with VIM
  • Manage Processes
  • Miscellaneous Commands

Dealing with Directories


mkdir  test -> Creates directory

cd test -> Change directory to test

cd .. -> Navigate to previous directory in the tree

cd - -> Navigate to previous directory

cp -rf test /usr/local -> Copies the test directory and all the content to /usr/local/

mv -rf test /usr/local -> Moves the test directory and all the content to /usr/local/

rm -rf test ->  Deletes test directory

mv test test2 -> Renames test to test2

Dealing with File Content


============================ CAT ======================================

cat test.txt (view contents in a file)
cat -n test.txt (view content with line numbers)

============================ WC =======================================

wc test.txt (view lines, words and characters)
wc -l test.txt (only lines)

============================ HEAD =====================================

head test.txt (get top 10 lines)
head -n 5 test.txt (returns top 5 lines)

============================ TAIL =====================================

tail test.txt will (return last 10 lines)
tail -n 5 test.txt (returns last 5 lines)
tail -f /var/log/messages (live monitoring on what is happening on the system)

============================ LESS ======================================

less test.txt (a simple editor)
/kernel (search kernel key word)

============================ GREP ======================================

grep bash /etc/passwd (searches word kernel in test.txt)
grep bash /etc/passwd /etc/group (search a word multiple files)
grep -e root -e bash /etc/passwd /etc/group
grep bas /etc/passwd -c (number of keywords found)
grep -i bas /etc/passwd (CASE INSENSITIVE)
grep root_file test.txt -w (Search exact word)

============================ CUT =========================================

cut -d : -f 1 /etc/passwd (cuts the row into columns based on delimiter : in this case)
cut -d : -f 1,5 passwd (1 and 5)
cut -d : -f 1-5 passwd (1 to 5)
free -m (view memory usage)
free -m foo.txt (writes the output to file)
cut -d ' ' -f 4 foo.txt4
[limitation of cut: files need to be even and well formatted]

============================ AWK ===========================================

awk '{print $4}' foo.txt (returns only 4th column default delimiter is spaces)
awk -F : '{print $1}' passwd (F-field seperator)
awk -F : '{print $1,$3}' passwd (1 and 3)

============================ SEARCH =========================================
find /root -iname "*.log" - Search for files with .log extension

Getting started with VIM

Quick Options in Vim Editor:


vim /etc/ssh/sshd_config

:set nu - Show line numbers

:set nonu - No line numbers

:set ic - Set Case insensitivity

:set noic - Set No Case insensitivity

yy - copy line

yw - copy word

10yy - copy 10 lines

dd - cut line

10dd - cut 10 lines

dw - cut word

gg - Puts Cursor at Beginning of a File

G - Puts Cursor at End of a File

Insert Mode 


i - Starts at Exact Cursor position

a - Start From Right Next to Cursor position

I - Puts Cursor position at Beginning of a Line

A - Puts Cursor position at End of a Line

o - Puts Cursor position to New line Below

O - Puts Cursor position to New line Above

cc - Puts the cursor by Deleting the Existing Line

Search


:s/root/rootX - Search (Case sensitive) & Replace root with rootX

:2s/root/rooX/gi - Search with case insensitivity and Replace first two search results

:%s/root/rootX/gi - Search with case insensitivity and Replace root with rootX


Manage Processes


htop -> list running process

kill 1232 or kill -TERM 1232 or kill -15 1232 -> Terminate process

kill -KILL 1232 or kill -15 1232 -> Force Terminate process

ps -> list all processes

ps aux -> list all processes with details

ps axjf -> list all process with details and tree

kill -HUP 1232 -> Hangup signal reloads config of the process


Miscellaneous Commands


arch - Print Machine architecture

cal -Display Calendar

date - Display Date and Time

which java - Display version of Java installed

Beginner Linux Commands

Simple JPA Example

This exampe will use configuration by exception, which means the JPA Provider will map an entity to database using all the defaults.

Build

Create simple app using Maven, refer this post

Dependencies:

<dependency>
    <groupId>org.hibernate</groupId>
    <artifactId>hibernate-validator</artifactId>
    <version>5.3.0.Alpha1</version>
</dependency>
<dependency>
    <groupId>org.eclipse.persistence</groupId>
    <artifactId>org.eclipse.persistence.jpa</artifactId>
    <version>2.6.4</version>
</dependency>
<dependency>
    <groupId>mysql</groupId>
    <artifactId>mysql-connector-java</artifactId>
    <version>6.0.5</version>
</dependency>

Create a POJO Class User,

package com.example;

import javax.persistence.Entity;
import javax.persistence.GeneratedValue;
import javax.persistence.Id;
import javax.persistence.NamedQueries;
import javax.persistence.NamedQuery;
import javax.validation.constraints.NotNull;
import javax.validation.constraints.Size;

/**
 * Created by zillani on 11/26/2016.
 */

@Entity
@NamedQueries({
        @NamedQuery(name = "findAllUsers", query = "SELECT u FROM User u"),
        @NamedQuery(name = "findUserByName", query = "SELECT u FROM User u WHERE u.username=:username")
})
public class User {

    @Id
    @GeneratedValue
    private Long id;
    @NotNull
    private String username;
    @NotNull
    @Size(min = 6,max = 45)
    private String password;
    private String email;
    private String phone;
    private int age;
    private String gender;

    public User() {
    }

    public User(String username, String email) {
        this.username = username;
        this.email = email;
    }

    public Long getId() {
        return id;
    }

    public void setId(Long id) {
        this.id = id;
    }

    public String getUsername() {
        return username;
    }

    public void setUsername(String username) {
        this.username = username;
    }

    public String getPassword() {
        return password;
    }

    public void setPassword(String password) {
        this.password = password;
    }

    public String getEmail() {
        return email;
    }

    public void setEmail(String email) {
        this.email = email;
    }

    public String getPhone() {
        return phone;
    }

    public void setPhone(String phone) {
        this.phone = phone;
    }

    public int getAge() {
        return age;
    }

    public void setAge(int age) {
        this.age = age;
    }

    public String getGender() {
        return gender;
    }

    public void setGender(String gender) {
        this.gender = gender;
    }
}

Create persistence.xml file under resources/META-INF

<?xml version="1.0" encoding="UTF-8"?>
<persistence xmlns="http://xmlns.jcp.org/xml/ns/persistence" xmlns:xsi="http://www.w3.org/2001/XMLSchema-instance" xsi:schemaLocation="http://xmlns.jcp.org/xml/ns/persistence http://xmlns.jcp.org/xml/ns/persistence/persistence_2_1.xsd" version="2.1">

<persistence-unit name="simple-jpa" transaction-type="RESOURCE_LOCAL">
<provider>org.eclipse.persistence.jpa.PersistenceProvider</provider>
<class>com.example.User</class>
<properties>
<property name="javax.persistence.schema-generation.database.action" value="drop-and-create"/>
<property name="javax.persistence.jdbc.driver" value="com.mysql.cj.jdbc.Driver"/>
<property name="javax.persistence.jdbc.url" value="jdbc:mysql://localhost:3306/test"/>
<property name="javax.persistence.jdbc.user" value="root"/>
<property name="javax.persistence.jdbc.password" value="root"/>
<property name="javax.persistence.sql-load-script-source" value="insert.sql"/>
<property name="eclipselink.logging.level" value="INFO"/>
</properties>
</persistence-unit>

</persistence>

Create sql file under resources

INSERT INTO test.user(ID,USERNAME,PASSWORD,EMAIL,PHONE,GENDER,AGE)VALUES(2,"zillani","root","shaikzillani@gmail.com","9247411984","male",25);
INSERT INTO test.user(ID,USERNAME,PASSWORD,EMAIL,PHONE,GENDER,AGE)VALUES(3,"Humayun","root","humayunsyed@gmail.com","9991234812","male",23);
INSERT INTO test.user(ID,USERNAME,PASSWORD,EMAIL,PHONE,GENDER,AGE)VALUES(4,"Mahesh","root","mahesh.b@gmail.com","9562235658","male",25);

Create a executable class, Main

package com.example;

import javax.persistence.EntityManager;
import javax.persistence.EntityManagerFactory;
import javax.persistence.EntityTransaction;
import javax.persistence.Persistence;
import java.util.List;

public class Main {

    public static void main(String[] args) {

        User user = new User();

        user.setAge(25);
        user.setEmail("stranger@gmail.com");
        user.setGender("female");
        user.setPassword("root");
        user.setPhone("9948184406");
        user.setUsername("rh");

        EntityManagerFactory entityManagerFactory = Persistence.createEntityManagerFactory("simple-jpa");

        EntityManager entityManager = entityManagerFactory.createEntityManager();
        EntityTransaction entityTransaction = entityManager.getTransaction();

        //INSERT USER INTO DB
        entityTransaction.begin();
        entityManager.persist(user);
        entityTransaction.commit();

        // FIND ALL USERS
        List<User> allUsers = entityManager.createNamedQuery("findAllUsers",User.class).getResultList();
        System.out.println("############## ALL USERS ###################");
        for (User allUser : allUsers) {
            System.out.println(allUser.getUsername());
        }
        System.out.println("############## ALL USERS ###################");

        //FIND USER BY USERNAME
        String un = "zillani";
        User foundUser = entityManager.createNamedQuery("findUserByName",User.class).setParameter("username",un).getSingleResult();
        System.out.println("################ FIND USER BY USERNAME #################");
        System.out.println(foundUser.getUsername());
        System.out.println("################ FIND USER BY USERNAME #################");
entityManager.close();
        entityManagerFactory.close();
    }
}

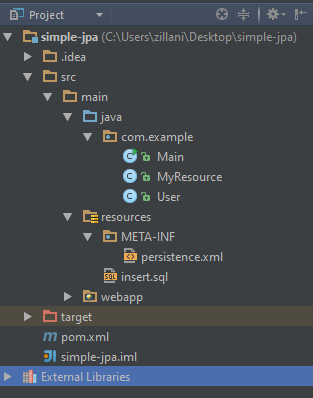
The Following should be the project structure, build the project using mvn clean install,

untitled

Running the main class should insert new Users into the database and verify the retrieved.

Download the example here

Simple JPA Example